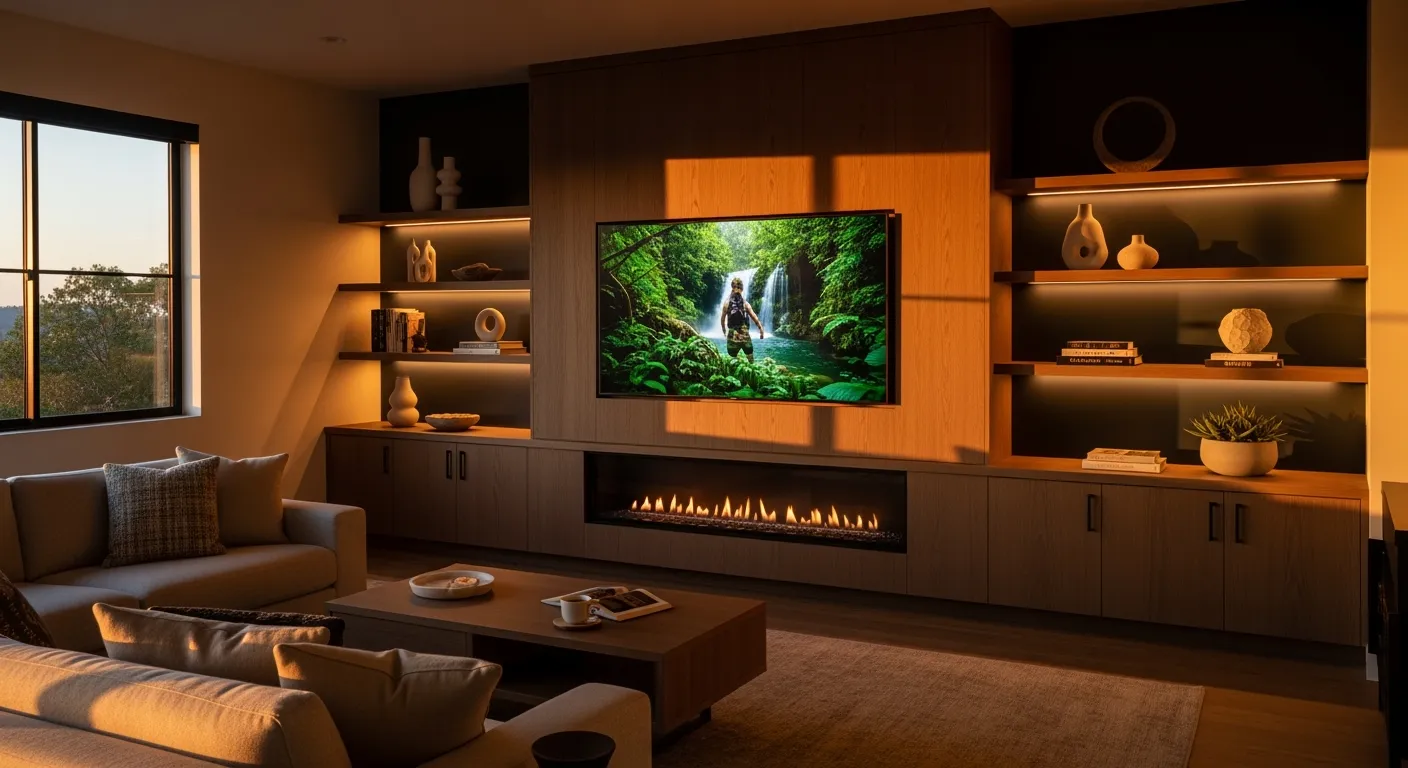
A living room can be beautifully furnished and still feel messy if the TV wall is doing too much. Loose cords, stacked game cases, remotes with no home, speakers balanced on whatever surface is nearby. It adds visual noise fast.
That is why built in media walls have become such a smart choice in both renovations and new construction. A well planned custom entertainment unit gives the room a focal point, hides the parts you do not want to see, and keeps the things you use every day easy to reach. When it is done well, the whole wall feels quieter. Cleaner. More intentional.
I think the best media walls do one simple job: they let the technology exist without making the room feel like a storage closet with a television.
If you are planning one, the details matter more than people expect. Good cabinet design is not just about how the wall looks in photos. It is about power, airflow, shelf depth, access, sound, and how your household actually lives.
A regular TV stand can handle the basics. A built in can solve problems.
The first difference is fit. A custom wall unit is designed around the exact width of your wall, the height of your ceiling, and the size of the equipment you own. That matters because living rooms are rarely perfect rectangles with perfect dimensions. There may be windows, fireplaces, vents, odd corners, or traffic paths that need to be respected.
The second difference is storage. Most living rooms need a strange mix of open access and hidden storage. You may want consoles, a soundbar, and a router accessible, but you probably do not want board games, charging cables, spare batteries, and kids' headphones sitting out all day. A built in can separate those zones cleanly.
The third difference is cable control. This is the big one. Freestanding furniture often leaves wires dangling behind the TV, dropping down the wall, or bunching into a knot near the outlet. A built in media wall gives those cables a path. That sounds boring until you have lived without it.
And then there is the overall feel of the room. A custom entertainment unit can tie together trim, shelving, finish color, and storage style so the TV wall feels like part of the architecture instead of an afterthought.
A lot of people begin by asking, “How big is the TV?” That is fair, but it should not be the first question.
Start with the room. Look at sightlines from the main seating area. Think about ceiling height. Check how much natural light hits the wall. Notice whether the TV will compete with a fireplace, large art, or windows. A good media wall should make the room feel balanced, not overloaded.
Before any drawings happen, it helps to answer a few practical questions:
What will live in the unit besides the TV?
Do you want open shelves, closed storage, or both?
Will the room need space for gaming consoles, a modem, or a sound system?
Are you building around an existing wall, or can wiring be planned before drywall?
Do you want the TV to disappear visually, or be the clear focal point?
Those answers shape everything that comes next.
For example, a family room used daily by kids usually needs more closed storage than a formal sitting room. A home with multiple gaming systems needs better ventilation and easier cable access than a room used mainly for streaming. A renovation has different limits than a new build, especially when it comes to running wires inside the wall.
This is where many media walls succeed or fail.
Hiding cables is not the same as stuffing them behind a cabinet and hoping nobody notices. If power cords, HDMI cables, ethernet lines, speaker wires, and charging cords are not planned early, you end up working around a mess later.
The cleanest setups usually include a recessed outlet behind the TV and a dedicated path inside the wall or cabinetry for low voltage cables. That keeps wires hidden from view without crushing them or making future changes miserable.
A few details matter here:
Power lines and data or signal cables should be handled properly and according to local code. This is not a place to improvise. If you are opening walls, involve an electrician where needed. It saves headaches, and sometimes it saves you from a failed inspection.
Technology changes faster than millwork. That is just reality. A conduit path behind the wall makes it much easier to swap cables later if you upgrade a TV, add a new device, or change from one system to another.
Even the neatest setup needs maintenance. Something will need resetting, unplugging, or replacing at some point. Access panels, removable backs, or discreet service openings make a big difference. You do not want to dismantle a custom unit just to reach one cord.
Modems and routers often get ignored in the early design stage, then end up sitting on a shelf because Wi-Fi performance drops when they are hidden in a sealed cabinet. Sometimes the right answer is a ventilated section of the media wall. Sometimes it is relocating the router entirely.
A media wall should hide cords, not create a secret cable nest you dread touching.
Entertainment equipment has a few annoying habits. It runs hot, it needs signal access, and it keeps changing size.
Game consoles especially need room to breathe. If they are placed in a tightly closed cabinet without airflow, heat builds up fast. That can shorten the life of the equipment, trigger fan noise, or cause performance issues. Some devices also need line of sight for remote controls, unless you use RF remotes or an IR repeater system.
This is where practical cabinet design beats decorative guessing.
Open shelving works well for devices that need airflow and frequent access. Closed storage works better for items you rarely touch or do not want visible. Many of the best media walls use a mix of both. For example, the center section might house active electronics behind a slatted or fabric friendly door, while side cabinets hold less sensitive clutter behind solid fronts.
Shelf dimensions matter more than most people think. A console compartment should be sized for the equipment you own now, with some breathing room around it. Tiny cubbies may look tidy on paper, but they become a problem the moment a larger device arrives.
I usually like to see these points checked before finalizing shop drawings:
Equipment width, height, and depth, including cables
Ventilation gaps around heat producing devices
Door style that allows signal transmission if needed
Nearby power access without a pile of extension cords
Enough hand space to plug and unplug devices comfortably
That last one gets forgotten all the time. If your fingers barely fit behind the console, maintenance turns into a chore.
A built in media wall can look sleek in a design render and still fail in real life if the storage is too precious to use. Real homes need room for ugly things. That is the truth.
Think beyond electronics. Living room clutter often includes remotes, charging cables, headphones, manuals, blankets, board games, extra controllers, small toys, candles, and random items that migrate from other rooms. If there is no designated place for those things, they land on open shelves or coffee tables.
Closed drawers in the lower section are often the hardest working part of a custom entertainment unit. They hold the daily mess without advertising it. Tall side cabinets can store taller items like cleaning tools, spare pillows, or seasonal decor. Adjustable shelving helps because your storage needs will shift over time.
Open shelves should be used with restraint. I like them for a few books, one or two decorative objects, maybe framed art. After that, they tend to become display space for things you did not know where else to put. A media wall is supposed to calm the room down, not multiply surfaces that collect clutter.
If the unit includes a long lower cabinet run, the top surface matters too. In some homes, that horizontal plane gets used like a sideboard. In others, it becomes a landing spot for drinks, devices, and whatever comes in from the car. A durable counter top material on the base section can make sense if the surface will get heavy daily use. That is especially useful in family rooms where durability matters as much as appearance.
Media walls live in a strange zone between furniture and architecture. The finish needs to work with trim, flooring, wall color, and nearby furnishings. It also needs to hold up.
Painted MDF is common for a classic built in look, especially when you want crisp profiles and a seamless finish. Veneers and wood grain laminates work well if you want warmth and a more modern feel. Textured finishes can help hide fingerprints, which matters more than people admit. High gloss looks sharp in the right room, but it shows smudges fast.
If the style leans minimal, handleless doors or integrated pulls keep the look clean. If the room is more traditional, framed doors and crown details may fit better. There is no single right answer. The right answer is whatever fits the home and still works five years from now.
Lighting is worth considering too. Integrated LED shelf lighting can look great, but it needs restraint. Too much and the wall starts feeling like a retail display. A soft wash on a few shelves is usually enough.
Material choices should also reflect how hard the room gets used. A formal sitting room can tolerate more delicate finishes than the main family TV room. Kids, pets, and regular traffic change the equation.
This part gets overlooked, especially when people collect inspiration images without thinking about what is inside the wall.
In new construction, you have more freedom. Electrical, data lines, speaker wiring, and wall blocking can be planned before drywall goes up. That makes a cleaner result easier to achieve. If you know early that a built in media wall is part of the room, it can be coordinated with lighting, HVAC vents, fireplace details, and trim.
Renovation is a little less forgiving. Existing outlets may be in the wrong place. Stud locations may interfere with the ideal TV position. Older homes may have surprises inside the wall, and sometimes the “simple” plan stops being simple once demolition starts. None of that means you should avoid a media wall. It just means the design needs to respond to the real conditions of the house.
A good cabinet maker will usually want accurate site measurements and a clear understanding of what is happening behind the wall before fabrication begins. That protects the design from avoidable revisions later.
Some problems show up immediately. Others take a few weeks to annoy you.
One common mistake is mounting the TV too high. It happens a lot when the wall is designed around symmetry instead of comfort. If the center of the screen forces you to tilt your head up every night, the wall may look good but it is not doing its job.
Another mistake is underestimating ventilation. Closed cabinets look neat, but electronics need airflow. A hot cabinet is a warning sign, not a minor issue.
Shallow shelves are another frequent problem. Many devices are deeper than they look once cables are attached. A compartment that technically fits the box may still be unusable if the wires have nowhere to bend.
People also forget future access. If every panel is fixed and every cable is buried, any upgrade becomes complicated. Your next TV should not require millwork surgery.
Then there is styling. I have mixed feelings about heavily decorated media walls. Some look great for a day, then start collecting dust and visual clutter. If the point is calm, leave breathing room. You do not need to fill every shelf.
The process goes better when the practical information is ready early.
Bring measurements of the wall, photos of the room, and a list of every device the unit needs to house. Include soundbars, consoles, routers, subwoofers, and anything else that affects size or access. Inspiration photos help too, but they are most useful when you can explain what you actually like in them. Is it the color? The symmetry? The way the TV blends into the paneling? The hidden storage?
Good cabinet design comes from that conversation, not from copying a picture exactly.
It also helps to be honest about how you live. If you want a room that always looks tidy, say that. If the living room doubles as a play space, say that too. If you hate seeing cables, that should shape the design from the start. If you want the lower cabinet to have a durable top surface, talk about whether a wood finish or a tougher counter top option makes more sense.
The more specific the brief, the better the result. This is where a skilled cabinet maker adds real value. They are not just producing boxes. They are solving storage, proportion, finish, and usability at the same time.
A built in media wall should make the room easier to live in. That is the whole point.
It should hide cables without trapping them. Store devices without cooking them. Give clutter a place to go. Fit the room instead of fighting it. And it should do all of that without asking for attention every second.
When people focus only on the final photo, they miss the best part. The real win is not how the media wall looks on day one. It is how much better the room functions on an ordinary Tuesday night, when the controllers are put away, the cords are invisible, and the living room feels settled for once.

.png)


